Your account
Creating your account, your team and who runs each interview, the slide design, how to bring in the questions you already have, candidate profiles, Screen Blackout, single sign-on, and SCIM provisioning.
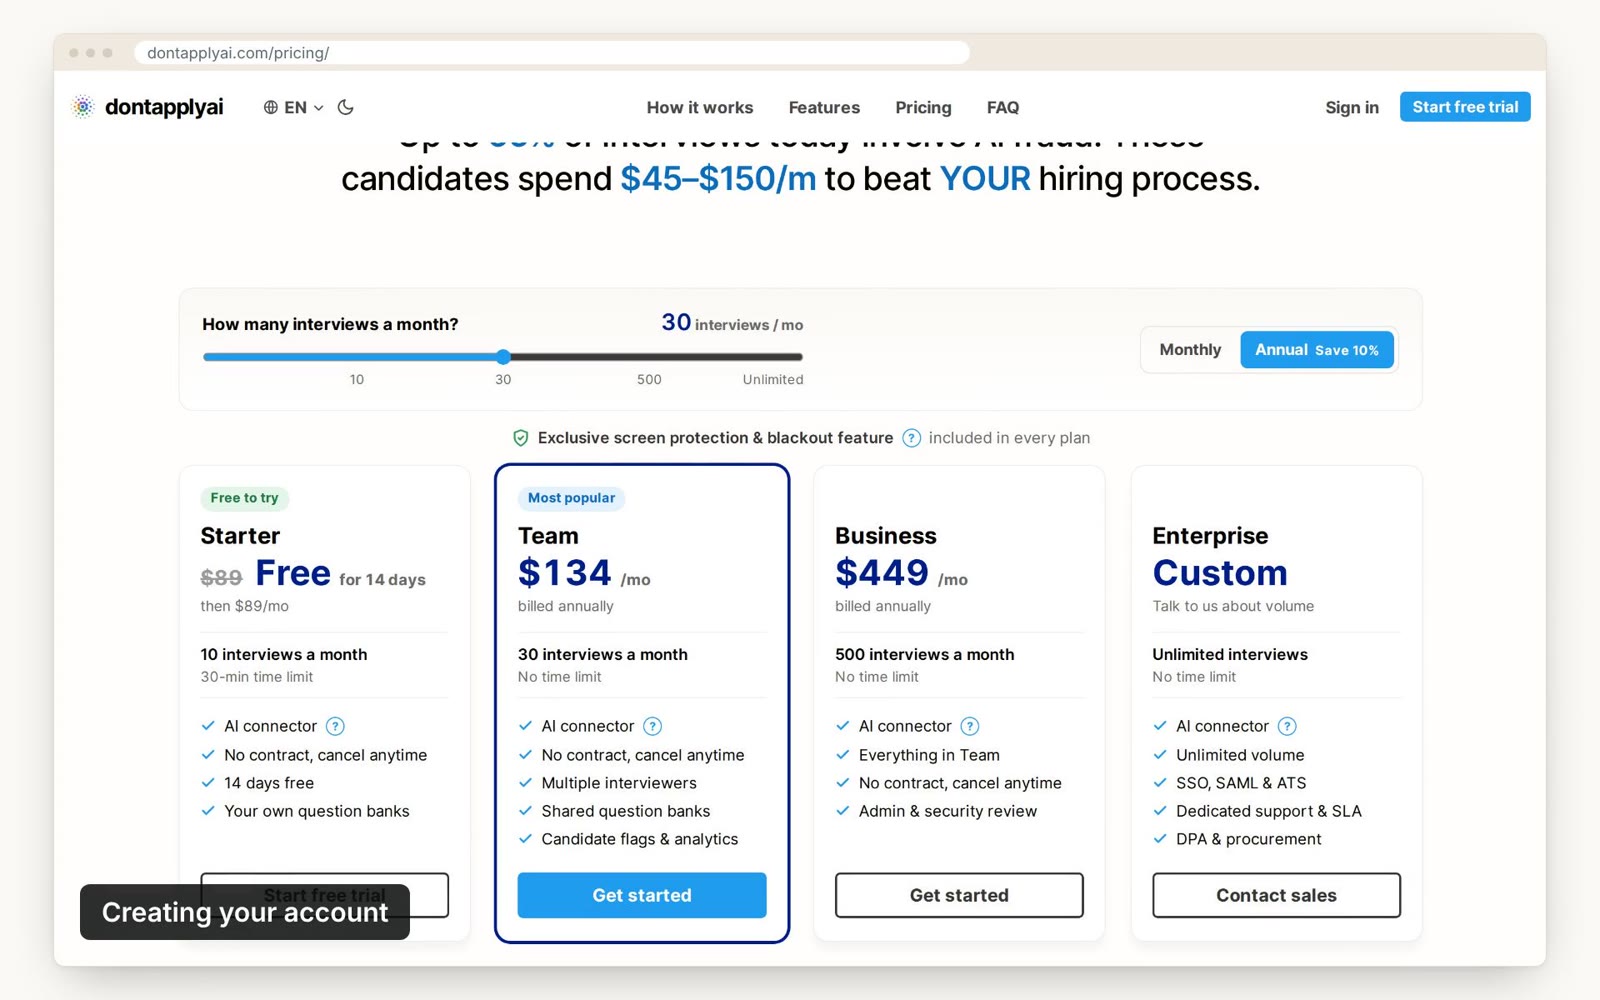
In this video guide
Creating your account
You create an account when you choose a plan. To create one:
- Step 1Choose Monthly or Annual on the pricing page, then click the button under the plan you'd like.
- Step 2Enter your name, job title and work email, then click Send code. We'll email you a six-digit code.
- Step 3Enter the code and click Confirm.
- Step 4Add your company name, country and size, accept the terms, and click Create account.
- Step 5On the Billing page that opens, click the button under your plan again and enter your card details. Starter is free for 14 days, and we don't charge your card until the trial ends.
Until your account has a plan, the console shows only Billing, Settings and Support. If your plan ends, an admin can still download your interviews from Settings. To keep your questions, export them with Export CSV on the Questions page before your plan ends.
Invited to a team? You don't need to create an account. Open the invitation and sign in with the address it was sent to.
Your team
Everyone on your team has one of four roles. An admin can do everything, including managing the team, billing and settings. A team member creates and runs interviews and changes questions. A viewer can read interviews, reports, candidates and questions, and add notes on candidates. A billing admin sees only the plan, invoices and payment details.
Admins, team members and viewers each use a seat on your plan. Billing admins don't. To invite someone:
- Step 1Click Account, then Team.
- Step 2Under Invite someone, enter their work email and choose their role.
- Step 3Click Invite. We'll email them a link to join.
To change someone's role later, choose a new one next to their name under Members.
Choosing who runs an interview
Each interview is run by one or more admins or team members: the person who created it, unless they chose someone else. You can change who runs it until the interview ends:
- Step 1Click Interviews.
- Step 2In the Interviewers column, click the names.
- Step 3Select everyone who will run it. Your choice is saved when the list closes.
You can also choose under Interviewers on the New interview page. We email each person you add a link to the interview, with its time and a calendar invitation when it has a time. Your candidate's invitation comes from the first person you chose. Click Mine on the Interviews page to see the interviews you run.
Designs
Every question uses the color-coded design. Your real question sits among other questions, each in a different color, with icons falling across the screen. Your control window shows which color to ask for, and the Designs page shows the design.
If your candidate finds the slide hard to read, click Redraw under Advanced settings for a new layout. To tell us about it, press H in the control window.
Importing questions
You can bring in the questions you already have. Under Questions, click Import, then choose one of these:
- With your AI assistant: connect your assistant through the AI connector, then copy the prompt and paste it into your assistant.
- From a CSV file: choose the file and click Import.
The CSV file can have these columns: text, kind, category, group, decoy1 to decoy5, notes, followup1 to followup5, flip, option_a to option_f and answer. Only text is required. If you leave the decoys empty, we'll write two for you, but your own usually work better.
The flip column keeps the changed version of a Constraint flip with the question. It isn't shown during the interview, so ask it as the next question or add it as a follow-up.
The kind column is one of question, flaw, flip, rapid or mc. A file can hold up to 200 questions. Each question can be up to 220 characters, and an import cuts longer ones short. You can import a file from Export CSV again.
Candidate profiles
Each candidate has a profile. It holds your team's notes on them, every interview they've had, and every question they were shown, with the marks and notes made on it. Only your team can see it.
- Step 1To open a profile, click the arrow beside Interviews, then Candidates, and click the candidate's name or reference. During an interview, click Profile in the Candidate card of your control window, and click Full page to open it in the console.
- Step 2To add a note, type it in the notes box and click Add note. You can delete your own notes.
- Step 3If you're an admin, you can choose under Deletion policy when the candidate's personal details are hidden: never, or from 30 days to a year after their last interview. To hide them right away, click Hide now.
Hiding removes their name, email address and notes from every page. Nothing is deleted, and their interviews and marks stay under their reference. The deletion policy counts from the end of their last interview, and Hide now works only once all their interviews have ended.
Note: You can't undo hiding.
Screen Blackout
Screen Blackout protects the questions on the candidate link. In browsers that support it, screenshots, screen recordings and AI tools that read the screen see a black box instead of the questions.
We approve each company by hand before turning it on: we review every new account, usually within 24 hours. You don't need to contact us.
Screen Blackout under Signals on the Candidate card in your control window shows whether your candidate's browser supports it.
Single sign-on
With single sign-on, your team signs in to dontapplyai through your company's identity provider, such as Okta, Microsoft Entra ID or Google Workspace, instead of with an email code. It comes with the Enterprise plan. If your account doesn't have it yet, click Domains and single sign-on in Settings, then Talk to us.
It works for addresses at a domain your account has verified, so verify your domain first. Then an admin sets it up with OpenID Connect, as below:
- Step 1Click Account, then Settings, then Domains and single sign-on.
- Step 2Under New connection, enter a Name and your identity provider's Issuer URL, then click Add connection.
- Step 3In your identity provider, create an OpenID Connect web app. Click Copy next to Redirect URI and paste it into the app.
- Step 4Enter the app's Client ID and Client secret. If the secret expires, enter the date under Secret expires, and we'll email your admins a month before. Click Save.
- Step 5Click Test sign-in and sign in at your identity provider. The test shows you what your identity provider sent, and signs nobody in to dontapplyai.
- Step 6When the test passes, click Turn on.
Once it's on, people who enter an address at your domain on the sign-in page can click Continue with single sign-on. Someone new at your domain joins your account the first time they sign in, with the role you chose under Role for new people. To add people only by invitation, turn off Add new people.
To give people roles from their groups in your identity provider, enter the claim that lists their groups under Groups claim, then click Add group under Group roles for each group and choose its role. Each time someone signs in, their role follows their groups. Your last admin always stays an admin.
To require single sign-on for everyone at your verified domains, sign in through it yourself, then turn on Require single sign-on under Sign-in policy. Everyone else's email-code sign-ins at your domains end at once. People at other domains, such as contractors, keep using email codes.
For when your identity provider is down, choose up to two admins under Admins who keep email codes. If nobody is chosen when you turn on the requirement, you are. On the sign-in page they click Admin? Use an email code. Their sign-in ends after 8 hours, and we email your other admins each time.
A sign-in through single sign-on lasts one day. To change that, choose another length under Sign-in limit for single sign-on.
Changes to single sign-on and to your domains need a sign-in from the last 15 minutes. If yours is older, click Sign in again.
SCIM provisioning
With SCIM provisioning, your company's identity provider adds people to dontapplyai when they join, keeps their name and address up to date, and turns off their access when they leave. It works with Okta, Microsoft Entra ID, OneLogin and JumpCloud, and comes with the Business plan.
Your identity provider can add people only at a domain your account has verified, so verify your domain first. Your account also needs two admins before you make the first token, because your identity provider can turn off an admin's access. Then an admin sets it up:
- Step 1Click Account, then Settings, then SCIM provisioning.
- Step 2Click Copy next to Base URL.
- Step 3Click New token, then Copy. You can see the token only once.
- Step 4In your identity provider, turn on SCIM provisioning in your app for dontapplyai. Paste the base URL as its SCIM base URL, called Tenant URL in Microsoft Entra ID. Paste the token as its bearer token, called Secret Token in Entra ID.
- Step 5In Okta, choose userName as the unique identifier and HTTP Header as the authentication mode. In Entra ID, click Test Connection, then turn off provisioning for groups.
Someone your identity provider adds gets the role of their open invitation, if they have one. Otherwise they get the role chosen under Role for new people for single sign-on, or team member. Your identity provider never changes roles. You change them on the Team page.
When your identity provider turns someone off, they are signed out at once and can't sign in. Their seat is free, and the interviews they had not yet run have no interviewer until you choose one. They stay on the Team page marked Deactivated, and keep their role if your identity provider turns them back on. When it deletes someone, they are removed from your team.
If your plan has a seat limit and every seat is taken, your identity provider can't add anyone or turn anyone back on, and we email your admins, at most once a day.
To change tokens, make a new one, put it in your identity provider, then click Revoke next to the old one. You can have two tokens at a time. Changes to tokens need a sign-in from the last 15 minutes.
Transcript
0:00 To create an account, click the button under a plan on the pricing page. Enter your name, job title and work email, then the code we email you. Add your company's details, accept the terms, and click Create account. On the Billing page, click your plan's button again to add your card. Starter is free for 14 days.
0:22 Every question uses the same color-coded design. To see a sample, click Account, then Designs.
0:30 To bring in questions you already have, click Import on the Questions page. To use your AI assistant, connect it through the AI connector, then copy the prompt into it. Or choose a CSV file of up to 200 questions, and click Import.
0:47 To open a candidate's profile, click the arrow beside Interviews, then Candidates, and click their name. It holds your team's notes, their interviews, and every question they were shown, with your marks and notes. Type a note and click Add note. Only your team sees it. Under Deletion policy, admins can choose when their personal details are hidden, or click Hide now. Hiding can't be undone.
Still need help?
If you can't find the answer you're looking for, send us a message and we'll get back to you, usually within one working day.